Chroma bleed and lag, 240-line horizontal resolution, mistracking, head switching and time base error. Live in your browser, nothing to install.
Inks — choose how many drums you’re simulating. Two is the classic riso setup and where most of the character comes from; three adds range but compounds registration drift, exactly as it would on a real machine. Pick from the named ink library rather than a colour picker — more on why below.
Separation mode decides how your full-colour image becomes two or three inks, and it’s the control that most affects whether the result looks considered or muddy.
Per-ink tone curve — black point, white point and gamma for each ink. A good riso separation is mostly tonal adjustment, so expect to spend your time here rather than anywhere else.
Overprint is on by default and should usually stay on. Riso inks are semi-transparent, so where two overlap you get a genuine third colour rather than one hiding the other. Turning it off gives you knockout, which is occasionally right for flat graphics and almost never right for photographs.
Halftone runs once per ink. LPI around 70–85 matches real Riso output — much finer and you lose the visible screen that makes it read as riso. Angle is offset per ink by default to avoid moiré; break it deliberately if you want the interference. Screen type switches between halftone dots and error diffusion — real machines do both, and diffusion gives a grainier, more photographic result.
Registration is where the authenticity lives. Offset shifts each ink by the equivalent of a millimetre or two — subtle, not the wild displacement of a glitch. Rotation drift tilts each layer by up to a degree, because a sheet re-entering the machine for its second pass never sits at exactly the same angle. That rotation is the detail almost every riso filter misses, and it’s most of what separates convincing from approximate.
Paper — set the stock colour and texture. Riso is very often printed on coloured or off-white paper, and this single control changes the result more than any other. Show-through adds a faint ghost of the image from the reverse of the sheet.
Ink behaviour — dot gain spreads each ink into the paper, mottling varies density across solid areas, and roller marks add faint streaking in the feed direction. Riso solids are never perfectly flat; flat solids are the fastest tell that something is simulated.
Because colour has less bandwidth, it smears horizontally — a red jumper bleeds several pixels past its own edge. And because the colour signal is processed on a separate path, it arrives slightly late, so colour trails behind the shape it belongs to. Meanwhile luminance stays comparatively sharp, which is why VHS looks simultaneously detailed and wrong.
That’s why chroma bleed and chroma lag are separate controls here. Bleed is the smear; lag is the delay. Most VHS filters blur the whole image and call it done, which produces something soft rather than something analogue.
The same asymmetry runs through horizontal resolution. VHS carries roughly 240 lines across the frame against full vertical resolution, so it’s soft horizontally and sharp vertically. Blur both axes and you’ve made a soft photo. Blur one and you’ve made tape.
Zoom in on a high-contrast edge and you should see colour extending past luminance in one direction only. If you can’t, raise bleed and lag.
Do it once per look and you have a set: clean tape grain, heavy tracking, a dropout pass. Note the seed and you can regenerate any of them at a different size later, which is the one thing a downloaded overlay pack can never do — those are fixed images at fixed resolutions that you’ll recognise on someone else’s work within a month.
For ready-made versions, our texture packs include VHS, CRT and print-degradation sets.
Tracking error is intermittent and band-shaped: the head loses the track and you get displaced, noisy horizontal bands. Raise warp and the image bends into the band rather than cutting, which is what real mistracking looks like.
Time base error is continuous rather than intermittent — small per-line horizontal displacement from the tape not moving at a perfectly constant speed. It’s the jitter control, and it’s the difference between an image that looks degraded and one that looks unstable.
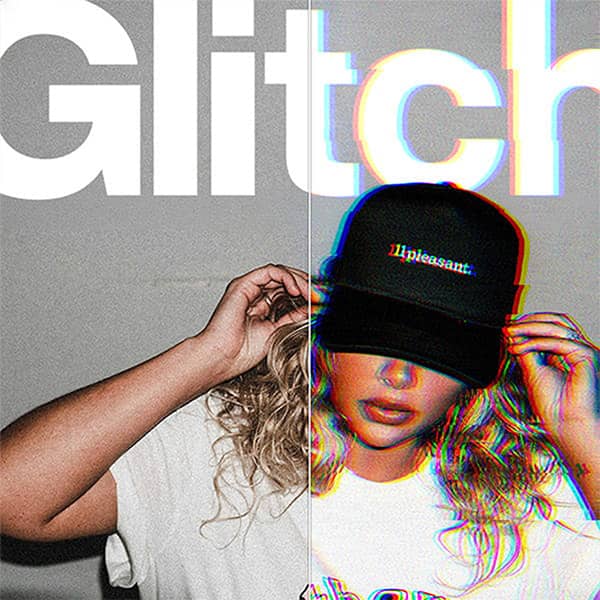
(If you’re after RGB channel splitting or slice tearing rather than tape faults, that’s the Glitch Effect Generator — different failure, different machine.)
This is worth more than it looks. The OSD was overlaid at playback, after the picture had already degraded, so it stayed crisp while everything behind it fell apart. Reproducing that contrast — hard-edged type over a soft, bleeding image — is a large part of why a still reads as VHS rather than as a filter. Getting it wrong by degrading the text along with the picture is the commonest mistake.
Set the mode, edit the timestamp, and position each element independently. A frame with PLAY ▶ and a date in the corner is legible as VHS at thumbnail size, which matters for social.
For handheld camcorder work specifically, pair it with high jitter, moderate bloom and a warm tape age.
App filters apply a fixed scanline-and-noise overlay with no control, which is why everything made with them looks the same. After Effects plugins cost money, need a subscription to run in, and export video when you wanted a still. Downloaded overlay packs are fixed images at fixed resolutions.
Here every parameter is live and every result is reproducible from its seed. Nothing to install, runs on desktop, tablet or phone, exports PNG at up to 2600px tagged 300 DPI.
Bandwidth was scarce. Colour got a fraction of luminance’s allocation, so it smears and lags. Horizontal resolution landed around 240 lines against a full vertical count, so the softness is directional.
The tape physically moves past a spinning head. It never moves at a perfectly constant speed, so lines displace — that’s time base error. The head occasionally loses the track, giving bands. And it switches between drums at the bottom of every field, which is why that torn band is always in the same place.
The medium degrades. Oxide sheds from the tape, giving dropouts. Ink— sorry, ferric particles realign with every pass, so a tape watched a hundred times looks materially different from one watched once.
None of it was designed. It was the visible cost of getting moving pictures into a plastic shell in 1976 — and it’s an aesthetic now precisely because it’s evidence of a physical object that wore out, in an era where a video file is identical on its ten thousandth play.
Every generator is free to use. Exporting your own work needs a plan. Get the Effects Generator on its own from $12 / month, or the full suite with the Scene Editor, the 3D Editor and 251+ mockup templates.
Get a feel for the core features
No credit card required
Mockup & Effects Generator plan
Cancel anytime / Secure payment
Get a feel for the core features
No credit card required
Mockup & Texture Generator plan
Cancel anytime / Secure payment
VHS stored colour at a fraction of the bandwidth it gave brightness, so colour smears horizontally past the edges it belongs to and arrives slightly late. Brightness stays comparatively sharp. That asymmetry is the single most recognisable VHS characteristic, and it is why bleed and lag are separate controls here rather than one blur applied to everything.
Yes. Set the source to a flat colour, raise noise, tracking error and dropouts, then export. You get an overlay to drop over your own artwork at any blend mode and opacity. Note the seed and you can regenerate the same overlay at a different size later.
It is the torn, skewed band across the bottom ten to twenty scanlines of the frame, caused by the video head switching between drums at the end of each field. It appears on every VHS frame ever recorded, always at the bottom, and it is one of the most recognisable tells that almost nothing else simulates.
Lower the general blur and raise horizontal resolution reduction instead. VHS carried roughly 240 lines across the frame against a full vertical count, so it is soft horizontally and sharp vertically. Blurring both axes produces a soft photograph rather than tape.
Only subtle interlaced field lines. Scanlines, phosphor masks and screen curvature are display artefacts from a cathode ray tube rather than tape artefacts, so they belong to the CRT Effect Generator. VHS and CRT are different machines and combining them tends to look wrong.
Yes. The on-screen display gives you PLAY, REC, PAUSE and fast-forward markers plus an editable timestamp, positioned independently. It renders crisp over the degraded picture, the way a real deck overlaid it at playback, and that contrast is a large part of why a still reads as VHS.
Yes. Every random decision derives from the seed, so the same seed with the same settings produces an identical result every time. That also makes the randomise button non-destructive.
Yes. Every export on a paid plan carries a full commercial licence, with no watermarks and no per-use fees.
| Cookie | Duration | Description |
|---|---|---|
| cookielawinfo-checkbox-analytics | 11 months | This cookie is set by GDPR Cookie Consent plugin. The cookie is used to store the user consent for the cookies in the category "Analytics". |
| cookielawinfo-checkbox-functional | 11 months | The cookie is set by GDPR cookie consent to record the user consent for the cookies in the category "Functional". |
| cookielawinfo-checkbox-necessary | 11 months | This cookie is set by GDPR Cookie Consent plugin. The cookies is used to store the user consent for the cookies in the category "Necessary". |
| cookielawinfo-checkbox-others | 11 months | This cookie is set by GDPR Cookie Consent plugin. The cookie is used to store the user consent for the cookies in the category "Other. |
| cookielawinfo-checkbox-performance | 11 months | This cookie is set by GDPR Cookie Consent plugin. The cookie is used to store the user consent for the cookies in the category "Performance". |
| viewed_cookie_policy | 11 months | The cookie is set by the GDPR Cookie Consent plugin and is used to store whether or not user has consented to the use of cookies. It does not store any personal data. |
Get instant access to the Scene Editor and 3D Editor. No credit card required.
Scene Pro feature
Play with the sample image as much as you like. Scene and Effects Members can run the generators on their own artwork and export the finished file plus print-ready separations.
Explore my options Already a member? Log inView